Ok...first off, I am no where near "skinny". I consider myself super-curvy with some pounds to spare. I keep them around for warmth and lack of motivation in the diet and exercise department. That being said, I am also pretty short. Like 5'1" short. Pants never fit me right and I find my dresser and closet clogged up with stuff I just don't wear. I have these corduroys by Gloria Vanderbilt that I have tried to throw out or donate several times and for some reason I always change my mind and put them back in my dresser. I've had them for years. They are too long, too baggy and not flattering. Well now that it is Fall, I want to wear boots and try to be semi-stylish. I decided I do not have enough cute boot type pants. So begins my adventure of turning my flared corduroys into skinny pants (for a chubby girl). I think they turned out great. They are updated and totally comfortable. Here is how I did it...
 |
| Start off with your baggy pants.. |
 |
| Told you, not flattering.. |
Then, starting in the crotch area, I began a straight stitch along my lines. I reinforced the crotch area like crazy because I DO NOT want to be flashing my lady parts at anyone. :0)
Once you have finished your initial straight stitch seam along both inner legs, you will want to turn the pants the RIGHT way and try them on again. This part is important because you want to make sure you like the fit before you remove the excess fabric. If parts are too tight you can take the seam out with your seam ripper and start over. I was quite pleased with my first seam. Once you are satisfied with the fit, turn the pants inside out again. Follow your original straight stitch with another row of stitches to make it extra strong.
Once you have two rows of stitching, go ahead and cut away the excess fabric leaving about a 1/4" seam allowance.
Looking Skinnier..
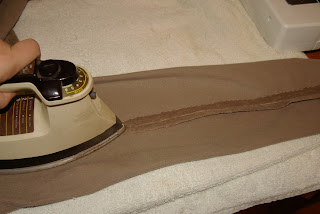
Take your iron and press the seam allowance open and flat.
Turn the pants the right way and press the outside of your new seam flat as well.
Now you can hem up the bottom and cut away any excess fabric if you are really short like me! :o)
Tada!!! Skinny pants on a super curvy girl!
This was SO easy. Took me about 30 minutes start to finish if you don't count all the times I had to stop to take care of my 11 month old busy boy. They are really comfy and now they are little more in style and they fit inside my boots. Yay!!! I have a few more pairs of outdated baggy pants and jeans that will be getting this same treatment. I hope this works for you too. Enjoy!


Wow! Awesome job!! They look great and they are very flattering (which is important as i am a bit curvy myself). I am very impressed and cannot wait to see more from you!
ReplyDeleteAmy. <3